

Want to keep your home safe without spending a fortune? You totally can! Building your own DIY home security under $100 is a smart move. It means no crazy monthly bills and you get to pick exactly what you need. This guide will show you how to set up a solid system that protects your place on a budget. It's easier than you think to get good security without breaking the bank.
Key Takeaways
- DIY home security under $100 is great for saving money and avoiding ongoing fees.
- You can get good security cameras and sensors without spending a lot.
- Setting up your own system is usually pretty simple, even for beginners.
- Smart placement of your sensors and cameras makes your system work better.
- Regular checks and updates keep your budget-friendly security system running smoothly.
Why Choose DIY Home Security Under $100?
Why spend a fortune on a professionally installed security system when you can achieve peace of mind for under $100? It's a valid question! Let's break down the advantages of going the DIY route for your home security.
Cost-Effective Protection
The most obvious benefit is the price. Traditional security systems often come with hefty upfront costs for equipment and installation. With a DIY system, you're in control of your budget. You can source affordable components and avoid expensive professional installation fees. Think of all the things you could do with the money you save! You can find top DIY home security systems that fit your budget.
No Monthly Fees
One of the biggest ongoing expenses with traditional security systems is the monthly monitoring fee. These fees can really add up over time! DIY systems offer the flexibility to self-monitor, eliminating those recurring costs. While professional monitoring is an option with some DIY systems, it's not a requirement. This gives you the freedom to choose what works best for your needs and budget. Self-monitoring can be a great way to save money.
Flexible Installation Options
DIY systems put you in the driver's seat when it comes to installation. No need to schedule appointments or wait for a technician. You can set up your system at your own pace, customizing it to fit your specific needs and preferences. Most components are designed for easy installation, often requiring nothing more than adhesive strips or a few screws. This flexibility is especially appealing if you rent your home, as you can easily move the system with you when you relocate.
DIY home security offers a compelling alternative to traditional systems, providing cost savings, flexibility, and control. By carefully selecting components and taking the time to set up your system properly, you can achieve a level of security that meets your needs without breaking the bank.
Essential Components for DIY Home Security Under $100
Building a DIY home security system on a tight budget doesn't mean you have to compromise on the essentials. You can still achieve a decent level of protection with a few carefully chosen components. It's all about prioritizing and finding the best deals.
Affordable Security Cameras
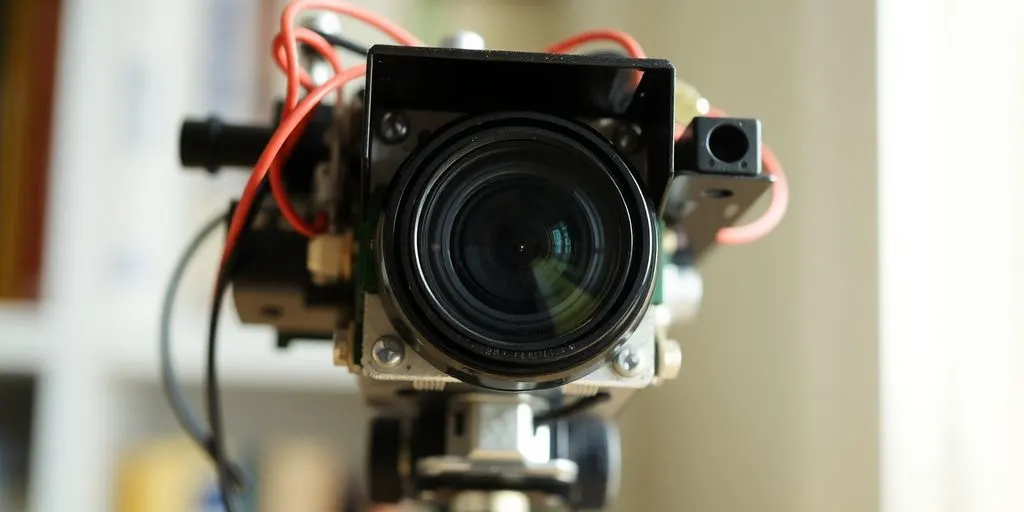
Security cameras are the eyes of your system. Even on a budget, you can find decent indoor cameras that offer motion detection and recording capabilities. Look for cameras with 720p or 1080p resolution to get a clear picture. Some models even offer night vision, which is a huge plus. Consider the placement of your camera; do you need a wide angle? Does it need to be discreet? These factors will influence your choice. For example, you can find a good indoor camera for less than $100, depending on features such as motion and sound alerts, local storage capabilities, and face recognition.
Budget-Friendly Motion Sensors
Motion sensors are your first line of defense. These little devices can detect movement in a room or hallway, triggering an alarm or sending you a notification. The key is strategic placement. Think about entry points like doors and windows, as well as areas where an intruder might move through. Wireless motion sensors are easy to install and relatively inexpensive. Here's a quick guide to help you choose:
- Coverage Area: Make sure the sensor covers the area you need to protect.
- Wireless Range: Check the range to ensure it can communicate with your base station.
- Battery Life: Look for sensors with long battery life to minimize maintenance.
Inexpensive Door and Window Sensors
Door and window sensors are simple but effective. They consist of two parts: one attached to the door or window frame and the other to the door or window itself. When the door or window is opened, the two parts separate, triggering an alarm. These sensors are very affordable and easy to install with adhesive strips. They're a great way to protect all your entry points without breaking the bank. Consider these points when selecting sensors:
- Easy Installation: Opt for sensors with adhesive backing for quick setup.
- Tamper Detection: Some sensors have tamper detection, which alerts you if someone tries to remove them.
- Compatibility: Ensure the sensors are compatible with your chosen security system.
Remember, a DIY system is all about customization. Start with the basics and add more components as your budget allows. Don't be afraid to shop around and compare prices to find the best deals. With a little effort, you can create a security system that meets your needs without emptying your wallet.
Selecting the Right Security Camera for DIY Home Security Under $100
Security cameras are a must-have for any DIY home security setup. But with so many options, how do you pick the right one without breaking the bank? It's all about knowing what features matter most and where you can save.
Understanding Camera Features
When you're shopping for a budget-friendly security camera, it's easy to get lost in the specs. Here's what to focus on:
- Resolution: Aim for at least 1080p for clear video. Anything lower might make it hard to identify details.
- Night Vision: Check if the camera has infrared (IR) night vision for black and white images, or color night vision, which is usually better but can cost more.
- Motion Detection: This is a key feature. Make sure the camera can reliably detect motion and send you alerts.
- Storage: Consider whether you want local storage (SD card) or cloud storage. Cloud storage usually comes with a monthly fee, so local storage can save you money in the long run.
- Two-Way Audio: This lets you talk to whoever is on camera, which can be useful for deterring intruders or talking to visitors.
Indoor Versus Outdoor Cameras
Indoor and outdoor cameras have different needs. Indoor cameras are usually cheaper and simpler, while outdoor cameras need to be weather-resistant.
- Indoor Cameras: These are great for monitoring inside your home. Look for features like pan and tilt, which let you remotely adjust the camera's view.
- Outdoor Cameras: These need to withstand rain, snow, and extreme temperatures. Check for an IP rating (like IP65 or IP66) to ensure weather resistance. Wireless outdoor cameras offer more placement flexibility, but you'll need to factor in battery life or wiring.
Integration with Smart Home Devices
A big advantage of DIY security is the ability to connect your camera to other smart home devices. This lets you create a more integrated and automated system.
- Compatibility: Make sure the camera works with your existing smart home platform (like Alexa, Google Assistant, or Apple HomeKit).
- Automation: You can set up rules to trigger actions based on camera events. For example, you could have your smart lights turn on when the camera detects motion.
- IFTTT: Some cameras support IFTTT (If This Then That), which lets you create custom integrations with other devices and services.
Choosing the right security camera involves balancing features, price, and your specific needs. Don't be afraid to do some research and read reviews before making a decision. A little bit of effort can go a long way in protecting your home without spending a fortune.
Setting Up Your DIY Home Security Under $100 System
So, you've gathered all your affordable security goodies. Now comes the fun part: actually setting up your DIY home security system. Don't worry, it's not rocket science, even if it might feel like it at first. With a little patience, you'll have your place secured in no time. Let's get started!
Simple Installation Steps
First things first, read the instructions! I know, I know, nobody likes reading manuals, but trust me, it'll save you a headache later. Each component, from the cameras to the sensors, will have its own specific installation process. Typically, this involves:
- Downloading the app associated with the device.
- Creating an account.
- Following the in-app instructions to connect the device to your Wi-Fi.
- Physically mounting the device in its desired location. Most sensors use adhesive strips, so no drilling is usually required, which is great if you're renting. If you're unsure about placement, do a quick search online for tips specific to your device model.
Connecting Components
Once each device is individually set up, you'll want to connect them to each other, if possible. This usually happens within the app. For example, you might want your motion sensor to trigger your camera to start recording. The exact steps for DIY home security integration will vary depending on the brands and models you've chosen, but the app should guide you through the process. If you're using a smart home hub, like a Google Home or Amazon Echo, you can often connect your security devices to the hub for centralized control.
Testing Your System
This is the most important step! Don't skip it. After everything is installed and connected, thoroughly test your system. Walk in front of your motion sensors, open and close your doors and windows to trigger the sensors, and check the live feed from your cameras. Make sure you receive notifications on your phone when something is triggered. If something isn't working correctly, troubleshoot it now, before you actually need it. It's better to find out that your door sensor isn't working during a test than during an actual break-in.
Testing should be done regularly, not just after the initial setup. Make it a habit to test your system at least once a month to ensure everything is still functioning properly. Batteries can die, Wi-Fi connections can drop, and software can glitch. Regular testing will help you catch these issues before they become a problem.
Maximizing Security with DIY Home Security Under $100

So, you've put together your budget-friendly home security system. Great! But simply having the components isn't enough. You need to make sure you're using them in a way that actually keeps your home safe. It's all about smart placement and using the features you have to their full potential. Let's talk about how to get the most out of your DIY setup.
Strategic Sensor Placement
Where you put your sensors makes a huge difference. Don't just slap them on any old door or window. Think about the most likely entry points for a burglar. First-floor windows and doors are obvious, but don't forget about back doors or basement windows. Placing sensors strategically can deter intruders before they even get inside.
Consider these points:
- Place door sensors on all exterior doors, including the garage entry door.
- Window sensors should be on windows that are easily accessible from the outside.
- Motion sensors should cover hallways and large rooms, especially near entry points.
Utilizing Smart Home Automation
One of the coolest things about DIY security is how you can tie it into your smart home setup. Even with a budget system, you can create some pretty effective deterrents. Think about it: lights that automatically turn on when a sensor is triggered, or a simulated occupancy schedule when you're away. Automation can make it look like someone's home even when they're not.
Here are some ideas:
- Connect your door/window sensors to smart lights. When a sensor is triggered, the lights flash or turn on.
- Use a smart plug to control a lamp and set it on a timer to mimic someone being home.
- Integrate your security camera with a smart display to view live footage easily.
It's important to remember that no system is perfect. A determined burglar might still find a way in. The goal is to make your home a less appealing target than the house next door. By combining smart sensor placement with home automation, you can significantly increase your home's security without breaking the bank.
Regular System Checks
Don't just set it and forget it. Your DIY security system needs regular checkups to make sure everything is working as it should. Batteries die, connections get loose, and software glitches happen. A quick weekly check can save you a lot of trouble down the road.
Here's what to check:
- Test all sensors to make sure they're triggering correctly.
- Check the battery levels of all wireless devices.
- Review camera footage to ensure it's clear and recording properly.
Maintaining Your DIY Home Security Under $100 System

Okay, so you've built your super-affordable DIY security system. Awesome! But like any system, it needs a little TLC to keep running smoothly. Think of it like your car – you wouldn't just drive it until it breaks down, right? Same goes for your home security. Regular maintenance will help you avoid headaches down the road and ensure your system is always ready to protect your home.
Battery Replacement Tips
One of the most common maintenance tasks is replacing batteries. Motion sensors and door/window sensors usually run on batteries, and they will eventually die. Here's what I do:
- Keep a stash of batteries: Buy a bulk pack of the right types (AA, AAA, CR2032, etc.) so you're never caught off guard.
- Set reminders: Use your phone or calendar to remind you to check battery levels every few months. Most systems will alert you when batteries are low, but it's good to be proactive.
- Replace promptly: Don't wait until the sensor completely dies. Replace the batteries as soon as you get a low-battery warning. This prevents gaps in your security.
Software Updates
Many affordable security cameras and smart hubs rely on software updates to fix bugs, improve performance, and patch security vulnerabilities. Ignoring these updates is like leaving your front door unlocked. Here's the deal:
- Enable automatic updates: If your devices have this option, turn it on! This way, you don't have to worry about manually checking for updates.
- Check manually: If automatic updates aren't available, make it a habit to check for updates every month or so. The device's app or website should have instructions.
- Read the release notes: Before updating, quickly scan the release notes to see what's new or fixed. This can help you understand if the update is important for your setup.
Troubleshooting Common Issues
Even with the best maintenance, things can still go wrong. Here are some common problems and how to fix them:
- False alarms: These can be annoying, but they're often caused by simple things like loose sensors, pets, or drafts. Double-check the sensor placement and sensitivity settings.
- Connectivity problems: If a sensor or camera suddenly stops working, check your Wi-Fi connection. Make sure the device is within range of your router and that your internet is working.
- App issues: If the app that controls your system is acting up, try closing it and reopening it. If that doesn't work, try restarting your phone or tablet. As a last resort, you might need to reinstall the app.
Regular maintenance is key to keeping your DIY home security system running smoothly. By following these simple tips, you can ensure that your system is always ready to protect your home and family. Don't skip on this step, it's important!
Expanding Your DIY Home Security Under $100 System
So, you've got your basic DIY security system up and running for under $100. Great! But what if you want more? The beauty of DIY is its scalability. You can always expand and improve your setup as your needs evolve or as you find more budget-friendly deals. Let's explore some ways to take your budget security system to the next level.
Adding More Sensors
One of the simplest ways to enhance your security is by adding more sensors. Think about blind spots in your current coverage. Do you have a back door that's unprotected? What about windows on the second floor? Adding extra door and window sensors can provide a more comprehensive security net. Consider these points:
- Perimeter Coverage: Focus on securing all entry points to your home.
- Specific Needs: Tailor sensor placement to address unique vulnerabilities, like a detached garage or shed.
- Cost-Effectiveness: Look for multi-packs or discounted bundles to save money when buying multiple sensors.
Integrating Smart Lighting
Smart lighting can be a powerful addition to your security system. The idea is to make it look like someone is home, even when you're not. You can achieve this by:
- Automated Schedules: Set lights to turn on and off at specific times to mimic occupancy.
- Motion-Activated Lights: Pair outdoor lights with motion sensors to deter potential intruders.
- Remote Control: Control your lights from anywhere using your smartphone, giving the impression of activity.
Integrating smart lighting is a great way to deter potential intruders. By making it appear as though someone is home, you significantly reduce the likelihood of a break-in. This simple addition can provide an extra layer of security and peace of mind.
Considering a Video Doorbell
A video doorbell is a fantastic addition to any home security system. It allows you to see and speak to visitors, even when you're not home. This can be especially useful for deterring package thieves or screening unwanted guests. When choosing a video doorbell, consider:
- Video Quality: Look for a doorbell with clear, high-resolution video.
- Motion Detection: Ensure it has reliable motion detection to alert you to activity at your door.
- Two-Way Audio: Make sure it has two-way audio so you can communicate with visitors. A DIY home security system can be expanded with a video doorbell.
Wrapping It Up
So, there you have it. Building your own home security system for under a hundred bucks is totally doable. It might seem like a big project at first, but once you get into it, you'll see it's not that hard. You get to pick exactly what you need, and you save a bunch of money by not paying for monthly fees or installation. Plus, there's a real sense of accomplishment when you know you've set up something important for your home yourself. Give it a shot; you might be surprised how easy and effective it can be.
Frequently Asked Questions
What is a DIY home security system under $100?
A DIY home security system for under $100 is a smart way to protect your home without spending a lot of money. It means you buy different security parts, like cameras and sensors, and put them together yourself. This way, you don't have to pay monthly fees or for someone to set it up for you.
Can I really build a reliable security system for less than $100?
Yes, absolutely! You can find good quality security cameras, motion sensors, and door/window sensors that are affordable. Many of these work well together, letting you build a strong security system without breaking the bank.
What should I look for in an affordable security camera?
Look for cameras that show clear pictures (at least 1080p resolution). Some good features to have are night vision, motion alerts (which tell you when something moves), and the ability to save videos. Also, check if it can connect with other smart devices you might have, like smart lights.
Is it hard to set up these DIY security devices?
Most DIY security parts are easy to set up. They often come with sticky pads or simple screws. You usually just need to follow the instructions to connect them to your home's Wi-Fi or a central hub, and then you can control them with an app on your phone.
Where should I place my sensors and cameras for the best protection?
To make your system work best, place cameras where they can see important areas, like your front door or back windows. Put motion sensors in rooms where intruders might enter. Door and window sensors should go on all ground-floor entry points. Thinking about where to put things makes your system much more effective.
How do I keep my DIY security system working well over time?
Even after you set it up, you'll want to check your system sometimes. Make sure the batteries in your sensors are good, update the software on your cameras when new versions come out, and test your system now and then to be sure everything is working as it should. This keeps your home safe and sound.

